This article explains how and where to create a meeting for a team/group. It explains the different components of a meeting invite.
Before you create a meeting make sure it does not overlap with other meetings. The process to create a meeting involves two steps:
- Go to the “General” channel in the SMPTE Standards Community team and check on the “Standards Calendar” if the meeting time and date are not already taken by another meeting from a different group.
- Go to the team you want to create a meeting for and access the “Calendar” tab in the “General” channel to create the meeting.
Here is detailed process on how to create a meeting
- (1) Click on the team in the teams list for which you want to schedule a meeting.
- (2) Click on the “Calendar” tab in the “General” channel of the team
- (3) Click on “+ Add new event” to open the “New meeting” window
- Alternatively, you can also click right into the calendar at the date and time you have determined for you meeting to open the “New meeting” window
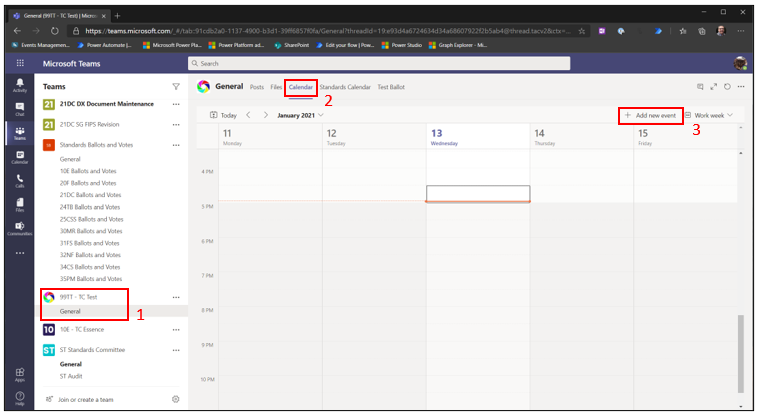
The above screen shot is taken from a test Team we created to test the calendar functionality. We will roll out this new Microsoft Teams Shared Calendar to all teams.
Only group chairs aka team owner should schedule a new event. Do not schedule any teams meetings for private purposes.
All scheduled events will be visible to all team member and the team owners.
- The “New meeting” window will allow you to enter the meeting details.
- (1) Please note that the channel for your meeting is already selected for you and can’t be changed. This is important because a message is posted to the conversation in the “General” channel of the team to alert your colleagues to the meeting
- (2) Make sure you enter the email address of the team aka group as required attendee. This makes sure all members of the team will receive an invite. Do not add any other attendees.
- (3) Give the meeting a name and make sure to add the name of the group as a prefix. In this example I used the name of the test team as prefix “[99TT – TC Test]”
- (4) You do not have to enter a location which usually would be a physical room. Leave the field blank.
- (5) Add any details about the meeting in the meeting body
- (6) Click “Send” to send the meeting to the group members and add it to the shared calendar
- Click “Close” if you want to discard the meeting.
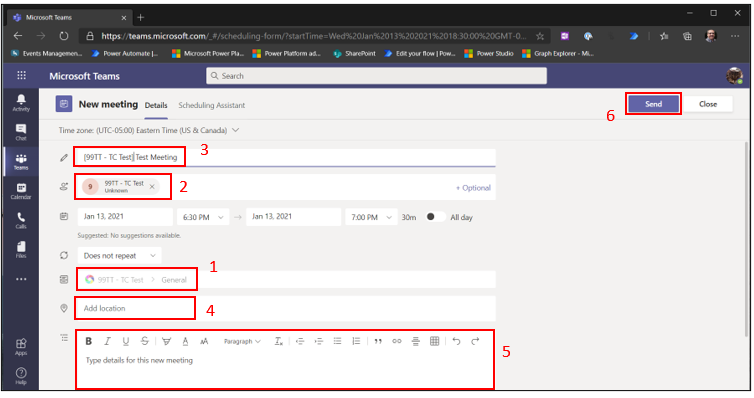
- The start and end meeting date/time can be set through the below controls. You can also set if the meeting will be a repeated event

- The meeting will appear in the calendar once the meeting invite is sent.
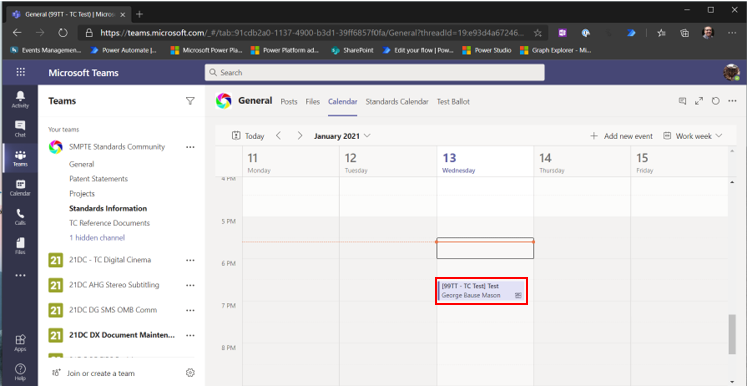
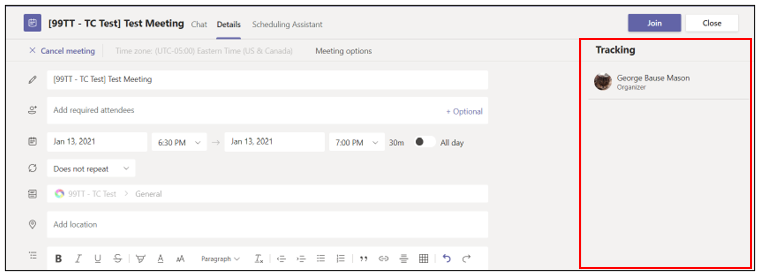
- Clicking on the event will enable you to either join or edit the event
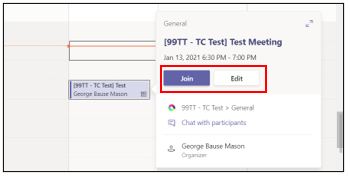
- In edit mode you can either change the event or investigate you accepted, declined etc. the event.
